Clear the maze in Brainrot Escape
Brainrot Escape: Diamond Quest places purple amethysts in a cartoon horror maze with monsters to avoid. The game's own guide gives the order: collect every amethyst, then unlock the portal and escape. Reaching the exit area with crystals still uncollected does not complete that objective.
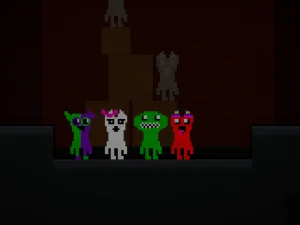
The Horror Park menu offers Solo and 2-Player buttons. In the verified solo opening, you select a character before entering the maze. Read that selection panel instead of assuming every character has the same ability. Speedster's panel describes a sprint lasting ten seconds, which gives that character a particular movement option to consider.
Use the map and remaining counter together
The minimap shows the maze layout and crystal positions. The Crystals Left counter tracks the remaining collection. Use both when choosing the next branch: the map helps locate what you need, while the counter confirms whether the gathering task is actually finished. Memory alone can leave you revisiting a corridor that no longer contains anything useful.
Work through connected sections with a plan for returning towards the portal. After clearing a branch, look for the next unvisited or unfinished area rather than immediately retracing the same movement. Keep attention on nearby monsters while consulting the route. Information is useful only if you leave yourself room to respond to the current threat.
Distinguish a sprint from a safe route
WASD moves the solo character, and F appears beside the selected ability icon. With Speedster selected, use that in relation to the sprint described by the character panel. Moving faster does not establish protection from monsters or replace knowing where the corridor leads.
Before using speed, choose the direction and the space where you want to arrive. A quick movement into an uncertain branch can create a new problem rather than resolve the current one. Follow the loaded game's instructions for another character or participation mode instead of assuming the solo key applies everywhere.
Read the timer for what it measures
The maze timer measures elapsed time, and the menu has a Best time display. That does not make it a countdown you must outrun. Your first aim can be completing the collection and escape safely. A faster successful route becomes a meaningful later goal once the task is understood.
If an attempt becomes confusing, check whether the problem is a missed crystal, a repeated empty route or a nearby monster. Those situations call for different decisions. The counter and map can resolve a collection uncertainty, while the visible threat may require a change of direction. Avoid treating every difficulty as a reason to sprint immediately.
Choose the kind of tension you want to practise
This example combines a spooky maze with collection and escape. Other entries in the horror collection can use different objectives, so read their descriptions before expecting the same map, counter or character ability. A shared atmosphere is not a shared set of mechanics or a promise about how intense a particular game will feel.
Set one useful goal for another session: clear branches more systematically, check the remaining count before returning or choose a sprint route more deliberately. Follow the actual controls and keep the objective in view. Horror becomes a more understandable challenge when the setting draws your attention without hiding the decisions needed to finish the task.